- 1. API with NestJS #1. Controllers, routing and the module structure
- 2. API with NestJS #2. Setting up a PostgreSQL database with TypeORM
- 3. API with NestJS #3. Authenticating users with bcrypt, Passport, JWT, and cookies
- 4. API with NestJS #4. Error handling and data validation
- 5. API with NestJS #5. Serializing the response with interceptors
- 6. API with NestJS #6. Looking into dependency injection and modules
- 7. API with NestJS #7. Creating relationships with Postgres and TypeORM
- 8. API with NestJS #8. Writing unit tests
- 9. API with NestJS #9. Testing services and controllers with integration tests
- 10. API with NestJS #10. Uploading public files to Amazon S3
- 11. API with NestJS #11. Managing private files with Amazon S3
- 12. API with NestJS #12. Introduction to Elasticsearch
- 13. API with NestJS #13. Implementing refresh tokens using JWT
- 14. API with NestJS #14. Improving performance of our Postgres database with indexes
- 15. API with NestJS #15. Defining transactions with PostgreSQL and TypeORM
- 16. API with NestJS #16. Using the array data type with PostgreSQL and TypeORM
- 17. API with NestJS #17. Offset and keyset pagination with PostgreSQL and TypeORM
- 18. API with NestJS #18. Exploring the idea of microservices
- 19. API with NestJS #19. Using RabbitMQ to communicate with microservices
- 20. API with NestJS #20. Communicating with microservices using the gRPC framework
- 21. API with NestJS #21. An introduction to CQRS
- 22. API with NestJS #22. Storing JSON with PostgreSQL and TypeORM
- 23. API with NestJS #23. Implementing in-memory cache to increase the performance
- 24. API with NestJS #24. Cache with Redis. Running the app in a Node.js cluster
- 25. API with NestJS #25. Sending scheduled emails with cron and Nodemailer
- 26. API with NestJS #26. Real-time chat with WebSockets
- 27. API with NestJS #27. Introduction to GraphQL. Queries, mutations, and authentication
- 28. API with NestJS #28. Dealing in the N + 1 problem in GraphQL
- 29. API with NestJS #29. Real-time updates with GraphQL subscriptions
- 30. API with NestJS #30. Scalar types in GraphQL
- 31. API with NestJS #31. Two-factor authentication
- 32. API with NestJS #32. Introduction to Prisma with PostgreSQL
- 33. API with NestJS #33. Managing PostgreSQL relationships with Prisma
- 34. API with NestJS #34. Handling CPU-intensive tasks with queues
- 35. API with NestJS #35. Using server-side sessions instead of JSON Web Tokens
- 36. API with NestJS #36. Introduction to Stripe with React
- 37. API with NestJS #37. Using Stripe to save credit cards for future use
- 38. API with NestJS #38. Setting up recurring payments via subscriptions with Stripe
- 39. API with NestJS #39. Reacting to Stripe events with webhooks
- 40. API with NestJS #40. Confirming the email address
- 41. API with NestJS #41. Verifying phone numbers and sending SMS messages with Twilio
- 42. API with NestJS #42. Authenticating users with Google
- 43. API with NestJS #43. Introduction to MongoDB
- 44. API with NestJS #44. Implementing relationships with MongoDB
- 45. API with NestJS #45. Virtual properties with MongoDB and Mongoose
- 46. API with NestJS #46. Managing transactions with MongoDB and Mongoose
- 47. API with NestJS #47. Implementing pagination with MongoDB and Mongoose
- 48. API with NestJS #48. Definining indexes with MongoDB and Mongoose
- 49. API with NestJS #49. Updating with PUT and PATCH with MongoDB and Mongoose
- 50. API with NestJS #50. Introduction to logging with the built-in logger and TypeORM
- 51. API with NestJS #51. Health checks with Terminus and Datadog
- 52. API with NestJS #52. Generating documentation with Compodoc and JSDoc
- 53. API with NestJS #53. Implementing soft deletes with PostgreSQL and TypeORM
- 54. API with NestJS #54. Storing files inside a PostgreSQL database
- 55. API with NestJS #55. Uploading files to the server
- 56. API with NestJS #56. Authorization with roles and claims
- 57. API with NestJS #57. Composing classes with the mixin pattern
- 58. API with NestJS #58. Using ETag to implement cache and save bandwidth
- 59. API with NestJS #59. Introduction to a monorepo with Lerna and Yarn workspaces
- 60. API with NestJS #60. The OpenAPI specification and Swagger
- 61. API with NestJS #61. Dealing with circular dependencies
- 62. API with NestJS #62. Introduction to MikroORM with PostgreSQL
- 63. API with NestJS #63. Relationships with PostgreSQL and MikroORM
- 64. API with NestJS #64. Transactions with PostgreSQL and MikroORM
- 65. API with NestJS #65. Implementing soft deletes using MikroORM and filters
- 66. API with NestJS #66. Improving PostgreSQL performance with indexes using MikroORM
- 67. API with NestJS #67. Migrating to TypeORM 0.3
- 68. API with NestJS #68. Interacting with the application through REPL
- 69. API with NestJS #69. Database migrations with TypeORM
- 70. API with NestJS #70. Defining dynamic modules
- 71. API with NestJS #71. Introduction to feature flags
- 72. API with NestJS #72. Working with PostgreSQL using raw SQL queries
- 73. API with NestJS #73. One-to-one relationships with raw SQL queries
- 74. API with NestJS #74. Designing many-to-one relationships using raw SQL queries
- 75. API with NestJS #75. Many-to-many relationships using raw SQL queries
- 76. API with NestJS #76. Working with transactions using raw SQL queries
- 77. API with NestJS #77. Offset and keyset pagination with raw SQL queries
- 78. API with NestJS #78. Generating statistics using aggregate functions in raw SQL
- 79. API with NestJS #79. Implementing searching with pattern matching and raw SQL
- 80. API with NestJS #80. Updating entities with PUT and PATCH using raw SQL queries
- 81. API with NestJS #81. Soft deletes with raw SQL queries
- 82. API with NestJS #82. Introduction to indexes with raw SQL queries
- 83. API with NestJS #83. Text search with tsvector and raw SQL
- 84. API with NestJS #84. Implementing filtering using subqueries with raw SQL
- 85. API with NestJS #85. Defining constraints with raw SQL
- 86. API with NestJS #86. Logging with the built-in logger when using raw SQL
- 87. API with NestJS #87. Writing unit tests in a project with raw SQL
- 88. API with NestJS #88. Testing a project with raw SQL using integration tests
- 89. API with NestJS #89. Replacing Express with Fastify
- 90. API with NestJS #90. Using various types of SQL joins
- 91. API with NestJS #91. Dockerizing a NestJS API with Docker Compose
- 92. API with NestJS #92. Increasing the developer experience with Docker Compose
- 93. API with NestJS #93. Deploying a NestJS app with Amazon ECS and RDS
- 94. API with NestJS #94. Deploying multiple instances on AWS with a load balancer
- 95. API with NestJS #95. CI/CD with Amazon ECS and GitHub Actions
- 96. API with NestJS #96. Running unit tests with CI/CD and GitHub Actions
- 97. API with NestJS #97. Introduction to managing logs with Amazon CloudWatch
- 98. API with NestJS #98. Health checks with Terminus and Amazon ECS
- 99. API with NestJS #99. Scaling the number of application instances with Amazon ECS
- 100. API with NestJS #100. The HTTPS protocol with Route 53 and AWS Certificate Manager
- 101. API with NestJS #101. Managing sensitive data using the AWS Secrets Manager
- 102. API with NestJS #102. Writing unit tests with Prisma
- 103. API with NestJS #103. Integration tests with Prisma
- 104. API with NestJS #104. Writing transactions with Prisma
- 105. API with NestJS #105. Implementing soft deletes with Prisma and middleware
- 106. API with NestJS #106. Improving performance through indexes with Prisma
- 107. API with NestJS #107. Offset and keyset pagination with Prisma
- 108. API with NestJS #108. Date and time with Prisma and PostgreSQL
- 109. API with NestJS #109. Arrays with PostgreSQL and Prisma
- 110. API with NestJS #110. Managing JSON data with PostgreSQL and Prisma
- 111. API with NestJS #111. Constraints with PostgreSQL and Prisma
- 112. API with NestJS #112. Serializing the response with Prisma
- 113. API with NestJS #113. Logging with Prisma
- 114. API with NestJS #114. Modifying data using PUT and PATCH methods with Prisma
- 115. API with NestJS #115. Database migrations with Prisma
- 116. API with NestJS #116. REST API versioning
- 117. API with NestJS #117. CORS – Cross-Origin Resource Sharing
- 118. API with NestJS #118. Uploading and streaming videos
- 119. API with NestJS #119. Type-safe SQL queries with Kysely and PostgreSQL
- 120. API with NestJS #120. One-to-one relationships with the Kysely query builder
- 121. API with NestJS #121. Many-to-one relationships with PostgreSQL and Kysely
- 122. API with NestJS #122. Many-to-many relationships with Kysely and PostgreSQL
- 123. API with NestJS #123. SQL transactions with Kysely
- 124. API with NestJS #124. Handling SQL constraints with Kysely
- 125. API with NestJS #125. Offset and keyset pagination with Kysely
- 126. API with NestJS #126. Improving the database performance with indexes and Kysely
- 127. API with NestJS #127. Arrays with PostgreSQL and Kysely
- 128. API with NestJS #128. Managing JSON data with PostgreSQL and Kysely
- 129. API with NestJS #129. Implementing soft deletes with SQL and Kysely
- 130. API with NestJS #130. Avoiding storing sensitive information in API logs
- 131. API with NestJS #131. Unit tests with PostgreSQL and Kysely
- 132. API with NestJS #132. Handling date and time in PostgreSQL with Kysely
- 133. API with NestJS #133. Introducing database normalization with PostgreSQL and Prisma
- 134. API with NestJS #134. Aggregating statistics with PostgreSQL and Prisma
- 135. API with NestJS #135. Referential actions and foreign keys in PostgreSQL with Prisma
- 136. API with NestJS #136. Raw SQL queries with Prisma and PostgreSQL range types
- 137. API with NestJS #137. Recursive relationships with Prisma and PostgreSQL
- 138. API with NestJS #138. Filtering records with Prisma
- 139. API with NestJS #139. Using UUID as primary keys with Prisma and PostgreSQL
- 140. API with NestJS #140. Using multiple PostgreSQL schemas with Prisma
- 141. API with NestJS #141. Getting distinct records with Prisma and PostgreSQL
- 142. API with NestJS #142. A video chat with WebRTC and React
- 143. API with NestJS #143. Optimizing queries with views using PostgreSQL and Kysely
- 144. API with NestJS #144. Creating CLI applications with the Nest Commander
- 145. API with NestJS #145. Securing applications with Helmet
- 146. API with NestJS #146. Polymorphic associations with PostgreSQL and Prisma
- 147. API with NestJS #147. The data types to store money with PostgreSQL and Prisma
- 148. API with NestJS #148. Understanding the injection scopes
- 149. API with NestJS #149. Introduction to the Drizzle ORM with PostgreSQL
- 150. API with NestJS #150. One-to-one relationships with the Drizzle ORM
- 151. API with NestJS #151. Implementing many-to-one relationships with Drizzle ORM
- 152. API with NestJS #152. SQL constraints with the Drizzle ORM
- 153. API with NestJS #153. SQL transactions with the Drizzle ORM
- 154. API with NestJS #154. Many-to-many relationships with Drizzle ORM and PostgreSQL
- 155. API with NestJS #155. Offset and keyset pagination with the Drizzle ORM
- 156. API with NestJS #156. Arrays with PostgreSQL and the Drizzle ORM
- 157. API with NestJS #157. Handling JSON data with PostgreSQL and the Drizzle ORM
- 158. API with NestJS #158. Soft deletes with the Drizzle ORM
- 159. API with NestJS #159. Date and time with PostgreSQL and the Drizzle ORM
- 160. API with NestJS #160. Using views with the Drizzle ORM and PostgreSQL
- 161. API with NestJS #161. Generated columns with the Drizzle ORM and PostgreSQL
- 162. API with NestJS #162. Identity columns with the Drizzle ORM and PostgreSQL
- 163. API with NestJS #163. Full-text search with the Drizzle ORM and PostgreSQL
- 164. API with NestJS #164. Improving the performance with indexes using Drizzle ORM
- 165. API with NestJS #165. Time intervals with the Drizzle ORM and PostgreSQL
- 166. API with NestJS #166. Logging with the Drizzle ORM
- 167. API with NestJS #167. Unit tests with the Drizzle ORM
- 168. API with NestJS #168. Integration tests with the Drizzle ORM
- 169. API with NestJS #169. Unique IDs with UUIDs using Drizzle ORM and PostgreSQL
- 170. API with NestJS #170. Polymorphic associations with PostgreSQL and Drizzle ORM
- 171. API with NestJS #171. Recursive relationships with Drizzle ORM and PostgreSQL
- 172. API with NestJS #172. Database normalization with Drizzle ORM and PostgreSQL
- 173. API with NestJS #173. Storing money with Drizzle ORM and PostgreSQL
- 174. API with NestJS #174. Multiple PostgreSQL schemas with Drizzle ORM
- 175. API with NestJS #175. PUT and PATCH requests with PostgreSQL and Drizzle ORM
- 176. API with NestJS #176. Database migrations with the Drizzle ORM
- 177. API with NestJS #177. Response serialization with the Drizzle ORM
- 178. API with NestJS #178. Storing files inside of a PostgreSQL database with Drizzle
- 179. API with NestJS #179. Pattern matching search with Drizzle ORM and PostgreSQL
- 180. API with NestJS #180. Organizing Drizzle ORM schema with PostgreSQL
- 181. API with NestJS #181. Prepared statements in PostgreSQL with Drizzle ORM
- 182. API with NestJS #182. Storing coordinates in PostgreSQL with Drizzle ORM
- 183. API with NestJS #183. Distance and radius in PostgreSQL with Drizzle ORM
- 184. API with NestJS #184. Storing PostGIS Polygons in PostgreSQL with Drizzle ORM
- 185. API with NestJS #185. Operations with PostGIS Polygons in PostgreSQL and Drizzle
- 186. API with NestJS #186. What’s new in Express 5?
- 187. API with NestJS #187. Rate limiting using Throttler
In the last two parts of this series, we’ve dockerized our NestJS application. The next step is to learn how to deploy it. In this article, we push our Docker image to AWS and deploy it using the Elastic Container Service (ECS).
Pushing our Docker image to AWS
So far, we’ve built our Docker image locally. To be able to deploy it, we need to push it to the Elastic Container Registry (ECR). A container registry is a place where we can store our Docker images. ECR works in a similar way to Docker Hub. As soon as we push our image to the Elastic Container Registry, we can use it with other AWS services.
We need to start by opening the ECR service.

The first thing to do is to create a repository for our Docker image.

We must build our NestJS Docker image and push it into our ECR repository. Then, when we open our newly created repository, we can see the “View push commands” button.

Clicking on it opens a popup that serves as a helpful list of all the commands we need to run to push our image to the repository.

First, we need to have the AWS CLI installed. For instructions on how to do that visit the official documentation.
Authenticating with AWS CLI
The first step in the above popup requires us to authenticate. To do that, we need to understand the AWS Identity and Access Management (IAM) service.
IAM is a service that allows us to manage the access to our AWS resources. When we create a new AWS account, we begin with the root user that has the access to all AWS services and resources in the account. Using it for everyday tasks is strongly discouraged. Instead, we can create an IAM user with restricted permissions.
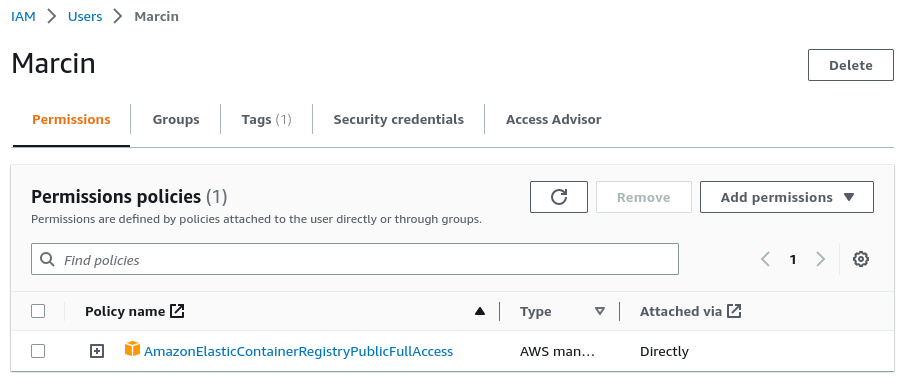
Our user needs to have the AmazonElasticContainerRegistryPublicFullAccess permission. It will allow us to push our image into ECR.

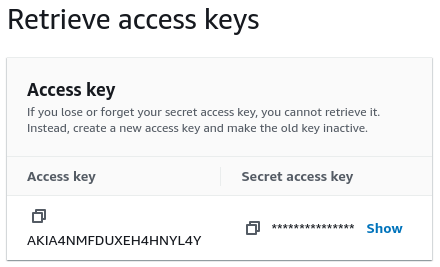
We need to open the “Security credentials” tab and generate an access key. We will need to use it with AWS CLI.

The last step is to run the aws configure command in the terminal and provide the access key and the secret access key we’ve just created.
Pushing the docker image
We can now follow the push commands in our ECR repository. First, we need to authenticate.
|
1 |
aws ecr-public get-login-password --region us-east-1 | docker login --username AWS --password-stdin public.ecr.aws/e2b3j8w6 |
We should receive the response saying “Login Suceeded”
Now, we need to make sure our Docker image is built.
|
1 |
docker build -t nestjs-api . |
If you want to know more about how we created our Dockerfile, check out the following articles:
Docker uses tags to label and categorize images. For example, the Docker image we created above has the nestjs-api:latest tag. Amazon ECR suggests that we make a new tag for our image.
|
1 |
docker tag nestjs-api:latest public.ecr.aws/e2b3j8w6/nestjs-api:latest |
The last step is to push the docker image to our ECR repository.
|
1 |
docker push public.ecr.aws/e2b3j8w6/nestjs-api:latest |
As soon as we do the above, our image is visible in ECR.

We will soon need the the Image URI that we can copy in the above interface.
Creating a PostgreSQL database
Our NestJS application uses a PostgreSQL database. One way to create it when working with the AWS infrastructure is to use the Relational Database Service (RDS). Let’s open it in the AWS user interface.

The process of creating a database is relatively straightforward. First, we must provide the database type, name, size, and credentials.
Make sure to keep the password and username we type here, we will need them later.

As soon as the database is created, we can open it in the user interface and look at the “Endpoint & port” section. There is the URL of the database that we will need soon.

Using the ECS cluster
One of the most fundamental services provided by AWS is the Elastic Compute Cloud (EC2). With it, we can launch virtual servers that can run anything. However, to use Docker with plain EC2, we would have to go through the hassle of installing and managing Docker manually on our server.
Instead, we can use the Elastic Container Service (ECS). We can use it to run a cluster of one or more EC2 instances that run Docker. We don’t need to worry about installing Docker manually when we use ECS.
Its important to understand that ECS is not simply an alternative to EC2. Those are two services that can work with each other.
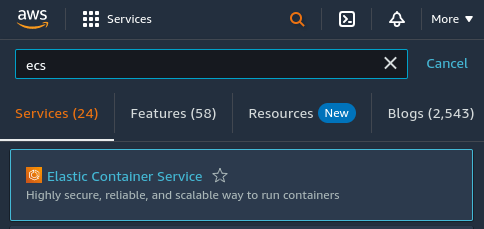
First, we need to open the ECS interface.

Now, we have to create a cluster and give it a name.

We can leave most of the configuration with the default values. However, we need to configure our cluster to use EC2 instances.

The t2.small EC2 instance ships with 2 GiB of ram. If you want to see the whole list of possible EC2 instances, check out the official documentation.
Creating a task definition
The Amazon ECS service can run tasks in the cluster. A good example of a task is running a Docker image. To do that, we need to create a task definition.

When configuring the task definition, we use the results of the previous steps in this article. First, we need to put in the URI of the Docker image we’ve pushed to our ECR repository.

Our NestJS application runs at port 3000. We need to expose it to be able to interact with it.

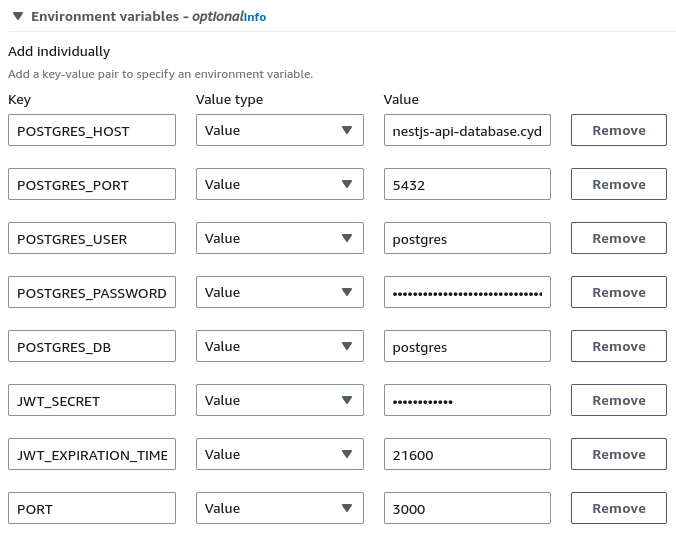
We also need to provide all of the environment variables our Docker image needs.

You can find the Postgres host value in the “Endpoint & port” section of our database in the RDS service
The last step we must go through when configuring our task definition is specifying the infrastructure requirements.

Configuring static host port mapping
By default, when we put 3000 in the port mappings in the above interface, AWS expects us to set up the dynamic port mapping. However, let’s take another approach for the sake of simplicity.
We will discuss dynamic port mapping in a separate article.
To change the configuration, we need to modify the task definition we’ve created above by opening our task definition and clicking the “Create new revision” button.
We then need to put 3000 as the host port in the port mappings section.

Once we click the “Create” button, AWS creates a new revision of our task definition.
Running the task on the cluster
Once the task definition is ready, we can open our cluster and run a new task.

First, we need to set up the environment correctly.

We also need to choose the task definition we’ve created in the previous step.

Please notice that we are using the second revision of our task definition that uses the static host mapping.
Once we click on the “Create” button, AWS runs the task we’ve defined.
Accessing the API
We can now go to the EC2 service to see the details of the EC2 instance created by our ECS cluster.

Once we are in the EC2 user interface, we need to open the list of our instances.

Once we open the above instance, we can see the Public IPv4 DNS section. It contains the address of our API.

Unfortunately, we are not able to access it yet. To do that, we need to configure our API to accept incoming requests on port 3000.
Setting up the security group
The security group controls traffic allowed to reach and leave the associated resource. Our EC2 instance already has a default security group assigned. To see it, we need to open the “Security” tab.

Clicking on the security group above opens up its configuration page. We need to modify its inbound rules to open port 3000. To do that, we need to create two rules. In the first one, we set “Anywhere-IPv4” as the source. In the second one, we choose “Anywhere-IPv6” and specify port 3000.

Once we do the above, we can start making HTTP requests to our API.

Summary
In this article, we’ve learned the basics of deploying a NestJS application to AWS using the Elastic Container Service (ECS) and Elastic Compute Cloud (EC2). To do that, we had to learn many different concepts about the AWS ecosystem. It included setting up a new Identity and Access Management (IAM) user, pushing our Docker image to the Elastic Container Registry (ECR), and running a task in the Elastic Container Service (ECS) cluster.
There is still a lot more to learn when it comes to deploying NestJS on AWS, so stay tuned!

i follow all steps but cannot access to public ip
Are you accessing it through HTTPS or HTTP?
I earnestly ask you to guide me to integrate elasticsearch into docker with the latest version, I have a problem when deploying it, docker can’t run even though on my local machine it works fine, Please see the implementation elasticsearch on production environment with https. I think maybe it’s because the ram is not enough for elasticsearch but I have increased and decreased elasticsearch still not working. So I really need a stable ECS production elasticsearch implementation for matching. Thank you very much
Are you using mac to create your docker file?
I had the same problema. Both HTTPS or HTTP. I fixed the problem by adding the PORT variable in the task, creating a 3 revision, i had forgotten I changed the security rules and ACL. It’s working now for HTTP.
Thank you so much!