- 1. JavaScript testing #1. Explaining types of tests. Basics of unit testing with Jest
- 2. JavaScript testing #2. Introducing Enzyme and testing React components
- 3. JavaScript testing #3. Testing props, the mount function and snapshot tests.
- 4. JavaScript testing #4. Mocking API calls and simulating React components interactions
- 5. JavaScript testing #5. Testing hooks with react-hooks-testing-library and Redux
- 6. JavaScript testing #6. Introduction to End-to-End testing with Cypress
- 7. JavaScript testing #7. Diving deeper into commands and selectors in Cypress
- 8. JavaScript testing #8. Integrating Cypress with Cucumber and Gherkin
- 9. JavaScript testing #9. Replacing Enzyme with React Testing Library
- 10. JavaScript testing #10. Advanced mocking with Jest and React Testing Library
- 11. JavaScript testing #11. Spying on functions. Pitfalls of not resetting Jest mocks
- 12. JavaScript testing #12. Testing downloaded files and file inputs with Cypress
- 13. JavaScript testing #13. Mocking a REST API with the Mock Service Worker
- 14. JavaScript testing #14. Mocking WebSockets using the mock-socket library
- 15. JavaScript testing #15. Interpreting the code coverage metric
- 16. JavaScript testing #16. Snapshot testing with React, Jest, and Vitest
- 17. JavaScript testing #17. Introduction to End-to-End testing with Playwright
- 18. JavaScript testing #18. E2E Playwright tests for uploading and downloading files
Our applications sometimes have features that allow users to choose files from their machine. Also, we might allow the users to download various files. Testing that with Cypress might not seem straightforward at first.
In this article, we build a simple React application that allows the users to choose a JSON file from the hard drive. Our application downloads a formatted version of the provided JSON when the users provide a valid file. Then, we use Cypress to test the file input and check whether the downloaded file is correct.
Creating a React application that deals with files
First, let’s make a component that contains a file input.
JsonFormatter.tsx
|
1 2 3 4 5 6 7 8 9 10 11 12 13 14 15 16 17 18 19 20 21 22 23 24 25 |
import React from 'react'; import useJsonFormatter from './useJsonFormatter'; const JsonFormatter = () => { const { handleJsonFile, error } = useJsonFormatter(); return ( <div style={{ display: 'flex', flexDirection: 'column', }} > <label htmlFor="json-file-input">Choose a valid JSON file</label> <input id="json-file-input" type="file" onChange={handleJsonFile} /> {error && ( <p data-testid="error-indicator" style={{ color: 'red' }}> {error} </p> )} </div> ); }; export default JsonFormatter; |
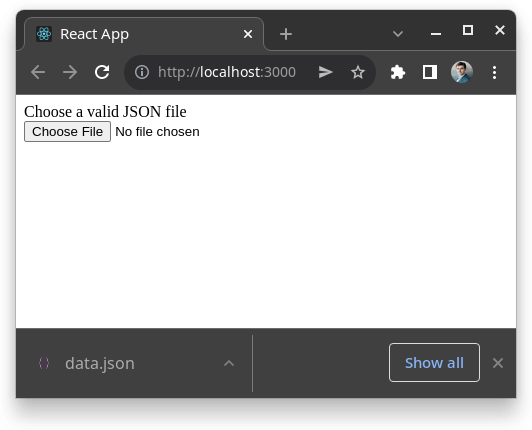
Thanks to creating the above component, we end up with the following user interface:

We contain the crucial part of the logic in the useJsonFormatter hook.
useJsonFormatter.tsx
|
1 2 3 4 5 6 7 8 9 10 11 12 13 14 15 16 17 18 19 20 21 22 23 24 25 26 27 28 29 30 31 32 33 34 35 |
import { ChangeEvent, useState } from 'react'; function useJsonFormatter() { const [error, setError] = useState<null | string>(null); const handleJsonFile = async (event: ChangeEvent<HTMLInputElement>) => { const chosenFile = event.target.files?.[0]; setError(null); if (!chosenFile) { return; } try { const fileText = await chosenFile.text(); const data = JSON.parse(fileText); const prettyJson = JSON.stringify(data, null, 2); const anchor = document.createElement('a'); const blob = new Blob([prettyJson], { type: 'application/json' }); const url = URL.createObjectURL(blob); anchor.setAttribute('href', url); anchor.setAttribute('download', chosenFile.name); anchor.click(); } catch { setError('The provided file does not contain valid JSON'); } event.target.value = ''; }; return { handleJsonFile, error, }; } export default useJsonFormatter; |
The above handleJsonFile function:
- extracts the text from the chosen file,
- parses the text as json,
- formats it using two spaces,
- sends the formatted file to the user.
If the users choose a valid JSON file, they receive a formatted version with the same filename.

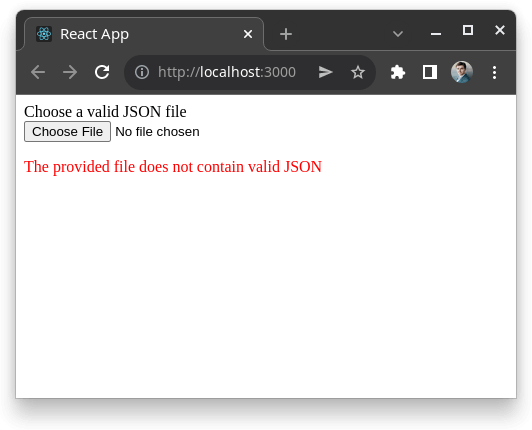
If the users choose an invalid JSON file, they see an error message.

Providing a file through Cypress
To create a Cypress test that interacts with file input, let’s install the cypress-file-upload library.
Installing the cypress-file-upload library
|
1 |
npm install --save-dev cypress-file-upload |
To use the above library properly, we need to add it to our tsconfig.json file:
tsconfig.json
|
1 2 3 4 5 6 7 |
{ "compilerOptions": { "types": ["cypress", "cypress-file-upload"], // ... }, // ... } |
We also need to import it through the cypress/support/commands.tsx file.
cypress/support/commands.tsx
|
1 |
import 'cypress-file-upload'; |
Creating the necessary files
We expect the user to choose a file from the hard drive in our application. To simulate that, we need to put the files in the cypress/fixtures directory. Let’s start by creating two files – one invalid and one valid.
cypress/fixtures/invalid-data.txt
|
1 |
{ "key": "value" |
Above, we use the .txt extension to avoid Cypress complaining about our JSON file not being valid.
cypress/fixtures/data.json
|
1 |
{ "key": "value" } |
Writing tests that interact with the file input
Thanks to doing all of the above, we can now write our first tests.
cypress/integration/JsonFormatter.test.tsx
|
1 2 3 4 5 6 7 8 9 10 11 12 13 14 15 16 17 18 19 20 21 |
describe('The JsonFormatter component', () => { beforeEach(() => { cy.visit(''); }); describe('when the user chooses an invalid file', () => { beforeEach(() => { cy.get('#json-file-input').attachFile('invalid-data.txt'); }); it('should display an error indicator', () => { cy.get('[data-testid="error-indicator"]'); }); }); describe('when the user chooses a valid file', () => { beforeEach(() => { cy.get('#json-file-input').attachFile('data.json'); }); it('should not display an error indicator', () => { cy.get('[data-testid="error-indicator"]').should('not.exist'); }); }); }); |
We use cy.visit('') above, because we’ve put the URL of our application into the baseUrl property. If you want to know more, check out JavaScript testing #6. Introduction to End-to-End testing with Cypress
Thanks to using the cypress-file-upload library, we can use the attachFile function in our tests and provide the name of a file we’ve put into the fixtures directory.
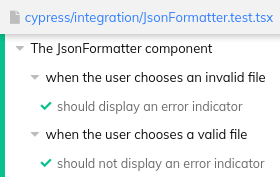
Running the above tests results in success.

Testing if a file was downloaded
When Cypress runs our tests and downloads files, it saves them in the cypress/downloads directory. To check this downloaded file, we can use Node.js. First, we need to define a task through the cypress/plugins/index.ts file.
To check if a file exists, we can use the fs.stat function provided by Node.js. It throws an error if a file does not exist.
If you want to know more about how Node.js and the File system module work, check out Node.js TypeScript #1. Modules, process arguments, basics of the File System
Since the fs.stat function uses callbacks, we can utilize util.promisify to use promises instead.
cypress/plugins/index.ts
|
1 2 3 4 5 6 7 8 9 10 11 12 13 14 15 16 17 |
import * as fs from 'fs'; import * as util from 'util'; const pluginConfig: Cypress.PluginConfig = (on) => { on('task', { async doesFileExist(path: string) { try { await util.promisify(fs.stat)(path); return true; } catch { return false; } }, }); }; export default pluginConfig; |
Thanks to registering a task in the above file, we can now use it in our tests. To access the path of the downloads directory, we can use Cypress.config('downloadsFolder').
cypress/integration/JsonFormatter.test.tsx
|
1 2 3 4 5 6 7 8 9 10 11 12 13 14 15 16 17 18 19 20 21 22 23 24 25 26 27 28 29 30 31 32 33 34 35 |
describe('The JsonFormatter component', () => { beforeEach(() => { cy.visit(''); }); describe('when the user chooses an invalid file', () => { beforeEach(() => { cy.get('#json-file-input').attachFile('invalid-data.txt'); }); it('should display an error indicator', () => { cy.get('[data-testid="error-indicator"]'); }); it('should not download a file with the same filename', () => { const downloadsFolder = Cypress.config('downloadsFolder'); cy.task('doesFileExist', `${downloadsFolder}/invalid-data.txt`) .then((doesFileExist: boolean) => { expect(doesFileExist).to.be.false; }) }); }); describe('when the user chooses a valid file', () => { beforeEach(() => { cy.get('#json-file-input').attachFile('data.json'); }); it('should not display an error indicator', () => { cy.get('[data-testid="error-indicator"]').should('not.exist'); }); it('should download a file with the same filename', () => { const downloadsFolder = Cypress.config('downloadsFolder'); cy.task('doesFileExist', `${downloadsFolder}/data.json`) .then((doesFileExist: boolean) => { expect(doesFileExist).to.be.true; }) }); }); }); |

Verifying the contents of a file
Let’s create an additional task to verify the contents of a file. To do that, we can use fs.readFile.
cypress/plugins/index.ts
|
1 2 3 4 5 6 7 8 9 10 11 12 13 14 15 16 17 18 19 20 21 |
import * as fs from 'fs'; import * as util from 'util'; const pluginConfig: Cypress.PluginConfig = (on) => { on('task', { async doesFileExist(path: string) { try { await util.promisify(fs.stat)(path); return true; } catch { return false; } }, async getFileContents(path: string) { const contentBuffer = await util.promisify(fs.readFile)(path); return contentBuffer.toString(); }, }); }; export default pluginConfig; |
Above, we first get a buffer containing the data. Then, since we want to verify its content, we use the toString function to receive a string.
If you want to know more about buffers, check out Node.js TypeScript #3. Explaining the Buffer
Once we have the above task ready, we can use it in our tests.
cypress/integration/JsonFormatter.test.tsx
|
1 2 3 4 5 6 7 8 9 10 11 12 13 14 15 16 17 18 19 20 21 22 23 24 25 26 27 28 29 30 31 32 33 34 35 36 37 38 39 40 41 42 43 44 45 |
describe('The JsonFormatter component', () => { beforeEach(() => { cy.visit(''); }); describe('when the user chooses an invalid file', () => { beforeEach(() => { cy.get('#json-file-input').attachFile('invalid-data.txt'); }); it('should display an error indicator', () => { cy.get('[data-testid="error-indicator"]'); }); it('should not download a file with the same filename', () => { const downloadsFolder = Cypress.config('downloadsFolder'); cy.task('doesFileExist', `${downloadsFolder}/invalid-data.txt`).then( (doesFileExist: boolean) => { expect(doesFileExist).to.be.false; }, ); }); }); describe('when the user chooses a valid file', () => { beforeEach(() => { cy.get('#json-file-input').attachFile('data.json'); }); it('should not display an error indicator', () => { cy.get('[data-testid="error-indicator"]').should('not.exist'); }); it('should download a file with the same filename', () => { const downloadsFolder = Cypress.config('downloadsFolder'); cy.task('doesFileExist', `${downloadsFolder}/data.json`).then( (doesFileExist: boolean) => { expect(doesFileExist).to.be.true; }, ); }); it('the downloaded file should contain a formatted JSON', () => { const downloadsFolder = Cypress.config('downloadsFolder'); cy.task('getFileContents', `${downloadsFolder}/data.json`).then( (fileContent: string) => { expect(fileContent).to.equal('{\n "key": "value"\n}'); }, ); }); }); }); |
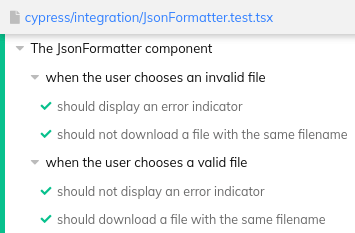
When we run all of the above tests, we see that they pass.

Summary
In this article, we’ve gone through the idea of combining Cypress with Node.js to deal with files. While doing so, we’ve learned how to simulate choosing a file from the hard drive. We’ve also verified the files saved in the downloads directory to ensure they exist and contain the correct data. The above might come in handy when working with various use-cases involving files.

Thank you for this great article, I learned about useful functions that where new to me!
How would you go about to handle downloaded files with dynamic file names. I need to get the last downloaded file (a solution to get the only file in the download fodler is also applicable). I didn’t find a solution to get the name of the file while downloading, to change the filename or to intercept the traffic (the file is downloaded without any requests that can be intercepted).
Thank you!