- 1. JavaScript testing #1. Explaining types of tests. Basics of unit testing with Jest
- 2. JavaScript testing #2. Introducing Enzyme and testing React components
- 3. JavaScript testing #3. Testing props, the mount function and snapshot tests.
- 4. JavaScript testing #4. Mocking API calls and simulating React components interactions
- 5. JavaScript testing #5. Testing hooks with react-hooks-testing-library and Redux
- 6. JavaScript testing #6. Introduction to End-to-End testing with Cypress
- 7. JavaScript testing #7. Diving deeper into commands and selectors in Cypress
- 8. JavaScript testing #8. Integrating Cypress with Cucumber and Gherkin
- 9. JavaScript testing #9. Replacing Enzyme with React Testing Library
- 10. JavaScript testing #10. Advanced mocking with Jest and React Testing Library
- 11. JavaScript testing #11. Spying on functions. Pitfalls of not resetting Jest mocks
- 12. JavaScript testing #12. Testing downloaded files and file inputs with Cypress
- 13. JavaScript testing #13. Mocking a REST API with the Mock Service Worker
- 14. JavaScript testing #14. Mocking WebSockets using the mock-socket library
- 15. JavaScript testing #15. Interpreting the code coverage metric
- 16. JavaScript testing #16. Snapshot testing with React, Jest, and Vitest
- 17. JavaScript testing #17. Introduction to End-to-End testing with Playwright
- 18. JavaScript testing #18. E2E Playwright tests for uploading and downloading files
With End-to-End testing (E2E), we test a fully working application where different parts of our application work together in real-life scenarios from start to finish. The End-to-End tests might also act as regression tests that check if our latest changes haven’t broken any previous features. We might also use them as smoke tests that ensure that the new version of our application is functional and that the crucial functionalities work as expected.
Thet term “smoke testing” is an analogy to electronics. It refers to the first moments of powering up the circuit and making sure that no smoke is coming from the device.
Introducing Playwright
When performing End-to-End tests on a frontend application, we simulate how real users interact with its interface. To do that, we can use Playwright, a framework that allows us to write automated tests that interact with our application through a web browser.
The most straightforward way to start working with Playwright is to run the npm init playwright@latest command in a new, empty directory. It will create a new project with Playwright, but it will first ask us a few questions. For example, it will ask if we want to install the dependencies necessary to run the tests in the simulated browser environment.
If you have the latest version of Ubuntu (23.10), you’re out of luck – Playwright does not support it. I had to manually download the libicu70 and libffi7 deb packages and even compile libx264-163 from source code.
The Playwright framework also asks us what the name of the directory is. By default, it is called tests.
Writing our first test
Playwright is built to resemble other JavaScript testing frameworks and provides functions such as describe and test that let us structure our tests.
homepage.test.ts
|
1 2 3 4 5 6 7 8 9 10 11 |
import { expect, test } from '@playwright/test'; test.describe('The home page', () => { test.describe('when visited', () => { test('should contain the correct title', async ({ page }) => { await page.goto('https://wanago.io'); await expect(page).toHaveTitle(/Wanago/); }); }); }); |
For each test, Playwright creates an instance of a page that provides methods to interact with a single tab in the browser.
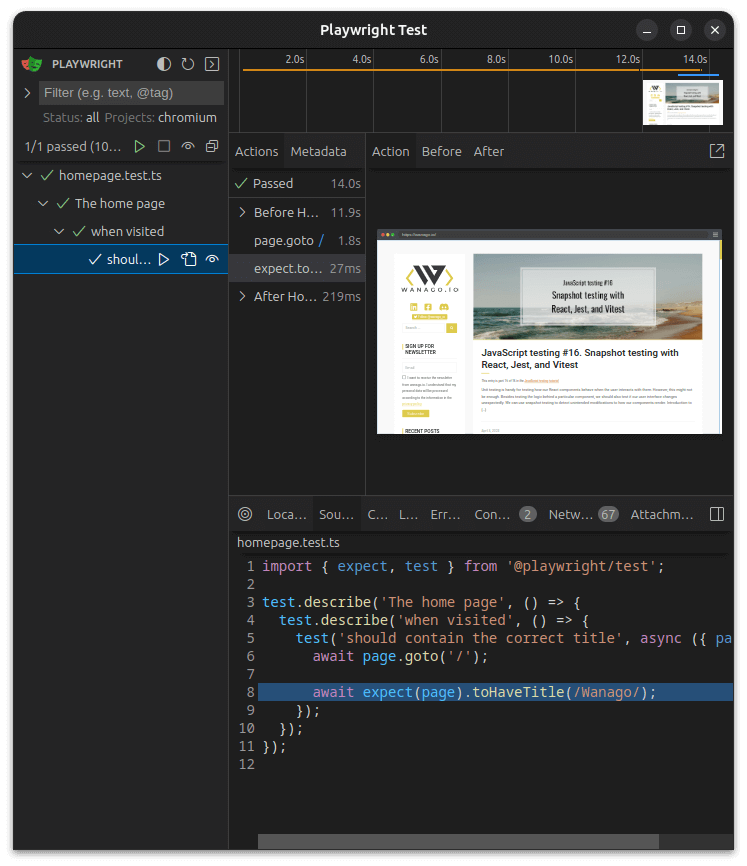
In our test, we start by navigating to a particular page using the page.goto() function. Since it interacts with the browser, it is asynchronous. Therefore, we should wait for it to finish using the await keyword.
Then, we use the expect function to check if the page meets a particular condition. The toHaveTitle function is asynchronous and waits until the page has a specific title. Because of that, we need to use the await keyword.
Using environment variables
If all of our tests focus on a particular web page, we can add its URL to the Playwright configuration generated when we ran the npm init playwright@latest command.
playwright.config.ts
|
1 2 3 4 5 6 7 8 9 10 11 12 |
import { defineConfig } from '@playwright/test'; import 'dotenv/config'; export default defineConfig({ use: { /* Base URL to use in actions like `await page.goto('/')`. */ baseURL: 'https://wanago.io', // ... }, // ... }); |
Thanks to that, we don’t need to type it explicitly in our tests. Instead, we can provide a path relative to the baseURL we provided in the configuration.
homepage.test.ts
|
1 2 3 4 5 6 7 8 9 10 11 |
import { expect, test } from '@playwright/test'; test.describe('The home page', () => { test.describe('when visited', () => { test('should contain the correct title', async ({ page }) => { await page.goto('/'); await expect(page).toHaveTitle(/Wanago/); }); }); }); |
There is a good chance that we will want to run our tests in various environments. When developing the application locally, we might want to point to localhost. In other cases, we will want to use a real, deployed application. To achieve this, we should use environment variables that we can configure per environment.
First, let’s create the .env file containing our application’s URL.
.env
|
1 |
BASE_URL=https://wanago.io |
A good practice is to avoid commiting the .env file to the repository because it might sometimes contain sensitive invormation.
A very straightforward way to ensure our application loads the above file is to use the dotenv library.
|
1 |
npm install dotenv |
playwright.config.ts
|
1 2 3 4 5 6 7 8 9 10 11 12 13 14 |
import { defineConfig } from '@playwright/test'; import 'dotenv/config'; /** * See https://playwright.dev/docs/test-configuration. */ export default defineConfig({ use: { /* Base URL to use in actions like `await page.goto('/')`. */ baseURL: process.env.BASE_URL, // ... }, // ... }); |
Now, whenever we want to change the URL of the application we are testing, we can modify the .env file.
Running our tests
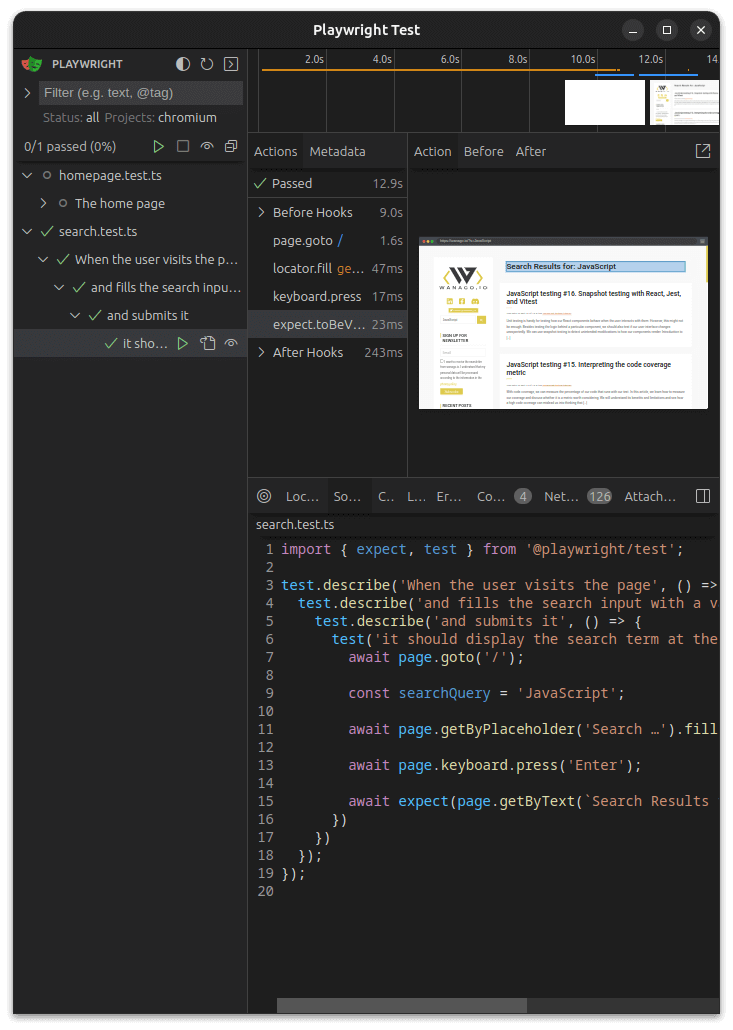
One way to run our tests is through the UI mode. It lets us choose which tests to run and in what browsers. We can also see Playwright interact with our website in real-time and ensure the tests run as expected.
|
1 |
npx playwright test --ui |

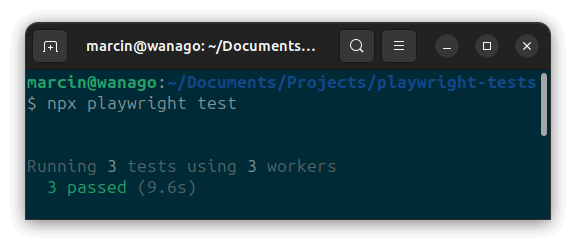
We can also run our tests in the headless mode. With this approach, no browser windows are opened, and we can see the results in the terminal. By default, the tests will run on multiple browsers.
|
1 |
npx playwright test |

Interacting with the page
Playwright can interact with the website in many different ways. To interact with an element on our page, we should first find it using the Locators API built into Playwright. Let’s find the search input on https://wanago.io.
|
1 |
const searchInput = page.getByPlaceholder('Search …'); |
Now, we fill the input with text. It’s asynchronous because Playwright waits for the element to be actionable before interacting with it.
|
1 2 |
const searchQuery = 'JavaScript'; await searchInput.fill(searchQuery); |
We can submit the form by pressing the enter key.
|
1 |
await page.keyboard.press('Enter'); |
Finally, we can check if submitting the form caused the search results to appear.
search.test.ts
|
1 2 3 4 5 6 7 8 9 10 11 12 13 14 15 16 17 18 19 |
import { expect, test } from '@playwright/test'; test.describe('When the user visits the page', () => { test.describe('and fills the search input with a valid string', () => { test.describe('and submits it', () => { test('it should display the search term at the top of the page', async ({ page }) => { await page.goto('/'); const searchQuery = 'JavaScript'; await page.getByPlaceholder('Search …').fill(searchQuery); await page.keyboard.press('Enter'); await expect(page.getByText(`Search Results for: ${searchQuery}`)).toBeVisible(); }) }) }); }); |
The toBeVisible() function is asynchronous because Playwright waits until the element we are looking for appears on the page.
Playwright waits a maximum of 5 seconds by default.

Besides checking if there is a particular piece of text on the page, there are multiple other assertions we can peform.
Organizing our tests
If we have multiple related tests in one file, there is a high chance that they will become repetitive.
search.test.ts
|
1 2 3 4 5 6 7 8 9 10 11 12 13 14 15 16 17 18 19 20 21 22 23 24 25 26 27 28 29 30 31 32 33 |
import { expect, test } from '@playwright/test'; test.describe('When the user visits the page', () => { test.describe('and fills the search input with a valid string', () => { test.describe('and submits it', () => { test('it should display the search term at the top of the page', async ({ page }) => { await page.goto('/'); const searchQuery = 'JavaScript'; await page.getByPlaceholder('Search …').fill(searchQuery); await page.keyboard.press('Enter'); await expect(page.getByText(`Search Results for: ${searchQuery}`)).toBeVisible(); }) test('it should redirect to a correct search page', async ({ page, baseURL, }) => { await page.goto('/'); const searchQuery = 'JavaScript'; await page.getByPlaceholder('Search …').fill(searchQuery); await page.keyboard.press('Enter'); await expect(page).toHaveURL(`${baseURL}/?s=${searchQuery}`); }); }) }); }); |
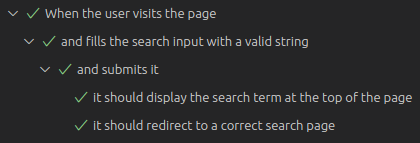
To deal with that, we can create beforeEach hooks that run before each test in a particular group of tests marked with test.describe.
search.test.ts
|
1 2 3 4 5 6 7 8 9 10 11 12 13 14 15 16 17 18 19 20 21 22 23 24 25 26 27 28 |
import { expect, test } from '@playwright/test'; test.describe('When the user visits the page', () => { test.beforeEach(async ({ page }) => { await page.goto('/'); }) test.describe('and fills the search input with a valid string', () => { let searchQuery: string; test.beforeEach(async ({ page }) => { searchQuery = 'JavaScript'; await page.getByPlaceholder('Search …').fill(searchQuery); }) test.describe('and submits it', () => { test.beforeEach(async ({ page }) => { await page.keyboard.press('Enter'); }) test('it should display the search term at the top of the page', async ({ page }) => { await expect(page.getByText(`Search Results for: ${searchQuery}`)).toBeVisible(); }) test('it should redirect to a correct search page', async ({ page, baseURL, }) => { await expect(page).toHaveURL(`${baseURL}/?s=${searchQuery}`); }); }) }); }); |

Thanks to this, our tests are easier to read and more scalable.
Summary
In this article, we’ve gone through the basics of End-to-End (E2E) tests and how to perform them with Playwright. To do that, we learned about different options for executing our tests with Playwright. We also used environment variables, interacted with our website in various ways, and learned how to organize our tests better.
Thanks to automating browser interactions, Playwright is a helpful tool for ensuring that our applications work as expected in real-life scenarios. It can be a very valuable asset for helping us make our software more reliable and bulletproof.

Hi Marcin, thanks for the helpful article.
How would you compare Playwright to Cypress regarding E2E testing? Where do they overlap and differ? Do you have any recommendations on when to use which framework? Is one of them better suited for CI/CD pipelines?